
IAMT #18: Vocals Mixing Basics in Reaper
findings from my six month music exploration

A hobby I had as a kid was dedicated to being a youtaite.
“Youtaite” is a portmanteau of “YouTube” and “utaite”. At one point, the term was used to describe singers who upload covers of Japanese songs (predominantly Vocaloid/vocal synth) onto Youtube
It didn’t get anywhere, of course, and I’ve since taken down most of my (trash) videos and only have a handful left up.
I would record on an old Turtle Beach headset microphone that I got with my Playstation 3 back in 2011; it would also double as the device used to talk shit on Call of Duty. I’d record in Audacity where’d I’d do basic things like normalizing volume, cutting out extra noise (like mouse clicks), and adding reverb from settings I’d find on google.
I’ve used the same workflow for years - if I ever had the itch to record something, I’d default to what I had learned as a tween.
Late last year, I had the motivational burst to make a polished cover again which came with the task of improving the process and becoming more efficient end-to-end, from recording vocals to a final mix. It’s led me down a rabbit hole that’s eaten up 90% of my hobby time for the last 6 months.
This’ll be an interactive blog post where you can listen to some basic mixing before and afters.
I chose to swap to Reaper for my DAW (Digital Audio Workstation), for no particular reason other than:
The current Youtaite community loves it
It’s “WinRAR free”
If you do buy, it’s a $60, one-time, perpetual license for personal usage
The base set of plugins are allegedly solid
What I quickly found out was how fantastic the Reaper community is. It’s still getting quite a bit of support, and a lot of creators make great free and/or open-source plugins for the community to use.
The one use-case I’ve been optimizing my skills for is for vocal covers/recordings. Alright, let’s get into a quick TL;DR of some of the basic concepts of vocal mixing.
My friend David recorded a cover of Keshi’s “Euphoria” that I mixed for him; I’ll be using that as the example piece today.
The first step was to remove excess sound (like mouse clicks or loud breathing) and normalizing the volume. I turned the mic input down while recording so that he wouldn’t clip (“when an audio signal exceeds what a system can handle”).
It would sound really quiet, but here’s what it sounds like at this point with the volume turned up, and the instrumental turned down:
Tuning and Timing
No Tuning
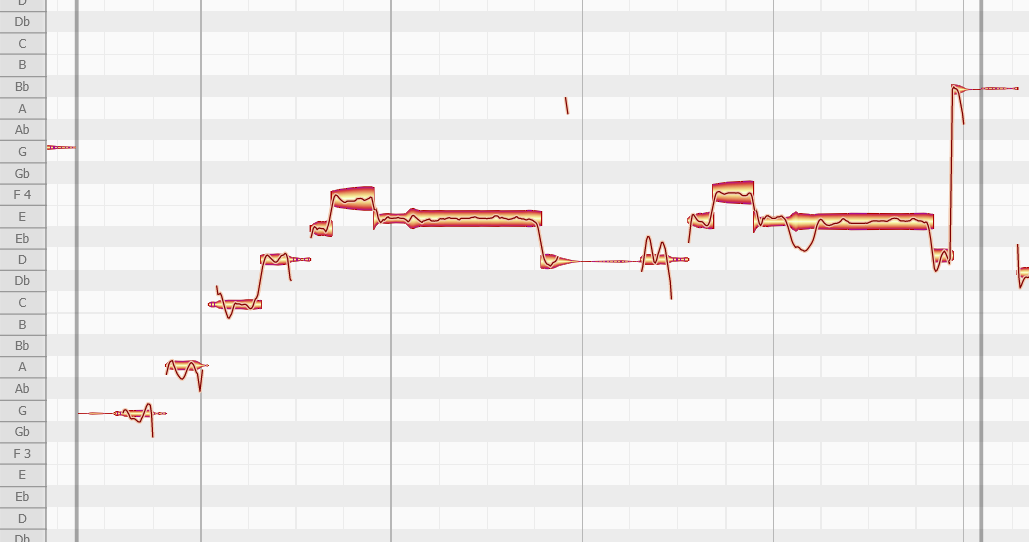
software called melodyne used for tuning/timing; the bars reflect the pitch With Tuning

pitches centered Since this mix is somewhat for fun, I didn’t time much, but the process would be adjusting the timing of the vocals to the instrumental. It helped that the original take is nearly perfect
The vocalist in this case is great at ad-libbing, so I used melodyne very sparsely and will let autotune handle the more subtle pitch correction down the line
Compressing (reducing dynamic range)
No Compressors
With Compressors
This example is easier to hear with earbuds but the above clips and cuts out noise
Equalizer (balancing volume across frequencies)
No Equalizer
Equalizer
Arguably one of the most important part of the mixing process. Really ends up defining the final sound/style of the vocals
Autotune
No Autotune
Max Autotune (included to show where the autotune is working/contrast with more subtle autotune)
With Tailored Autotune
Final w/ Reverb (my favorite part is 2:07)


It’s been a ridiculously fun ~6 months chasing this high. It’s a really fitting hobby for me - I can stay inside, I can do it alone (but also collaborate with others if I want), it’s relatively cheap, improvements on a track happen quick, and the results are tangible.
I’ve been more chronically online than ever, following other small musical artists and feeling inspired to push the envelope for improvement.
I actually wrote the first iteration of this post back in early January, hoping to publish the post while learning about the craft myself. I’m in a bit of a break period with it atm that seems to be the trend with how I write about my hobbies - just takes a bit to digest.
But yeah, won’t ramble too much. Thanks for reading :)
- chris